Setting up TDE on SQL Server Failover Cluster

Back in 2011 I wrote couple of Blog posts when I was initially exploring Encryption options we have in SQL Server. Never really got a chance to work on TDE since then. Fast forward to 2016, I am participating in TDE project, where we are enabling TDE for few of our databases which are hosted on SQL Server Failover Clustered Instances. Currently we are in testting/POC phase. In this post, I will share what my findings are about TDE on clustered instances. Let’s get started…

Enabling TDE on a clustered database is no different than how we enable on a Standalone Instance. Steps are as follows:

--a.
Create database TDE_Test
GO
--1.create a master key in master database.
USE master
GO
CREATE MASTER KEY
ENCRYPTION BY PASSWORD = 'Very$ecurepwd123'
--2.Create a certificate(name it)
USE master
GO
CREATE CERTIFICATE CLUSTPRD1_TDECert
WITH SUBJECT = 'Transparent Data Encryption Certificate'
--3. Create a database encryption key. –Based on the certificate from Step 2–Can use AES, DES, Triple DES, RC4 etc
USE TDE_Test--The db to protect
GO
CREATE DATABASE ENCRYPTION KEY WITH
ALGORITHM = AES_256
ENCRYPTION BY SERVER CERTIFICATE
CLUSTPRD1_TDECert--Cert from Step 2

--4. Turn it on!
USE TDE_Test--The db to protect
GO
ALTER DATABASE TDE_Test
SET ENCRYPTION ON
GO
-----Backup Certs---V V Imp
USE MASTER
GO
BACKUP CERTIFICATE CLUSTPRD1_TDECert
TO FILE = 'C:\TDE_Keys\CLUSTPRD1_TDECert.cer'
WITH PRIVATE KEY (FILE = 'C:\TDE_Keys\CLUSTPRD1_TDECert_Key.pvk' ,
ENCRYPTION BY PASSWORD = 'MyAw3S0m3Pwd123#' )
GO
--Backup SMK---VVV Important</pre>
BACKUP SERVICE MASTER KEY TO FILE = 'c:\keys\SQLPRD1_SMK.bak' ENCRYPTION BY PASSWORD = 'gytj6%&amp;5gjOUytp';

Okay…so what happens when SQL gets failed over to another node? Will TDE work? Will the database be still in usable state? The answer is “YES” from my initial testing. Everything remains intact. Nothing breaks!

Note: This is different from the way how it works in Alwayson AGs.

Reason: See below Screenshot taken from BOL.

3_arch

The Master Key which we created on step 1 is protected by Service master key(SMK) which is scoped at Instance level is the root of our Hierarchy, And then the certificate and the keys are scoped at master and user database levels which will be failed over and moved between nodes.So….Nothing special is required for FCIs. Please correct me If I am wrong and post any thoughts in comments.

Cheers!

SQL Server 2016 Cluster setup – What’s changed?

In this short blog post let’s take a screenshots tour of SQL Server 2016 Failover cluster installation and see if Microsoft made any significant changes to the setup process.

1

2

3

4

In the above two screenshots, I’ve provided my VNN and Instance name for SQL.

5

Add your Disks as needed.

6

provide your IP address.

7

Enter your Service accounts.

8

Select your Database directories accordingly and go to TempDB tab to check SQL installation wizard creating tempdb data files based on the number of CPUs you have got.

9

10

11

This is the first node of my cluster setup, hence you can see PRDSQLTREKA as the only node listed in the above screenshot. Next Next Done.

Now on the second node:

Select Add node to SQL Server Failover cluster and Next-Next-Next, provide service account and done.

12

13

Basically nothing has been changed specific to Cluster setup. If you are comfortable with earlier cluster setups, then you should be golden. Cheers!


SQL Server 2016 AlwaysON AG setup – Part 2

Now that I’ve created a windows cluster and installed SQL server on all the three nodes(Part 1), I am ready to configure AGs. Below is the screenshots tour.

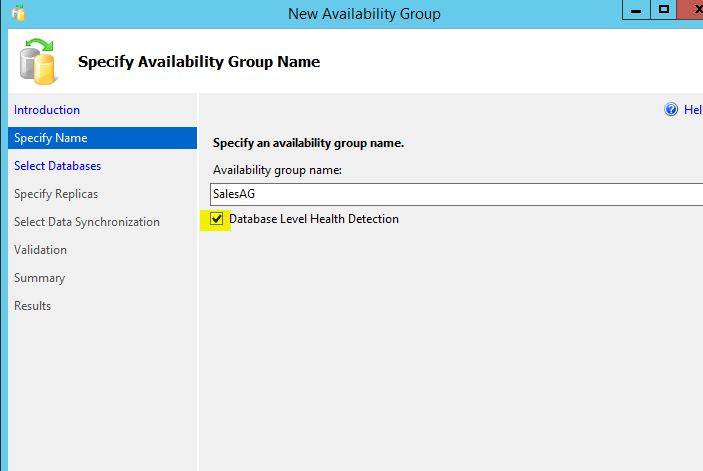
1.JPG

You can see  a new option “Database Level Health Protection” (In CTP releases It had “Basic AG”and “Per Database DTC Support” options as well.). Now, on Enterprise/Eval/Developer editions, all we get is above option. If you are trying to setup AG on standard edition(Wait till RTM gets released), then You should be seeing an option for Basic AG(Well, only Basic AG can be configured on standard edition)

So, what’s DB level health protection? If one of your databases in your AG goes offline or becomes unavailable for some reason, entire AG doesn’t get impacted.

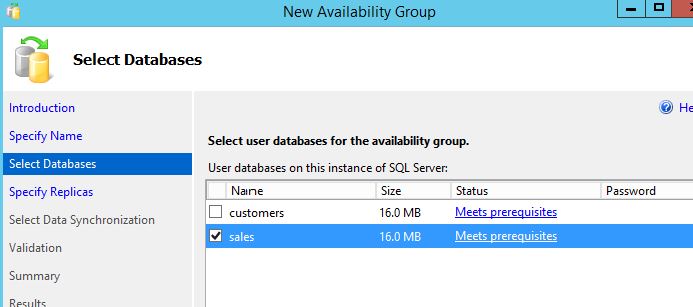
Next:

2

3.JPG

Here’s the bonus, Now we get 3 Synchronous(Automatic) replicas and Active secondaries are Load balanced with your routing list and also distributed transactions are now supported in 2016 AGs 🙂

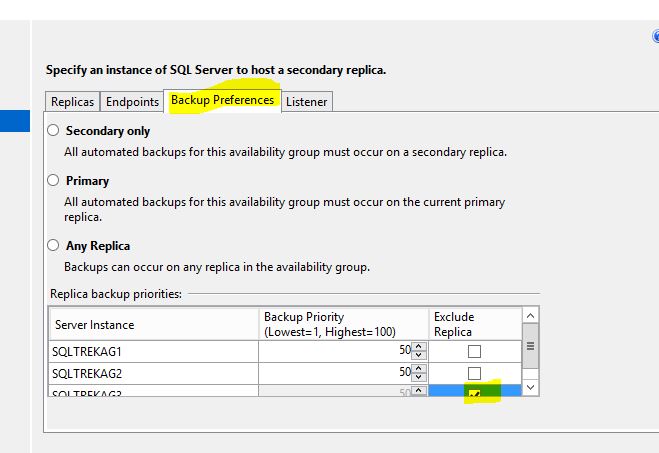
Now, pick your backup preferences.

4.JPG

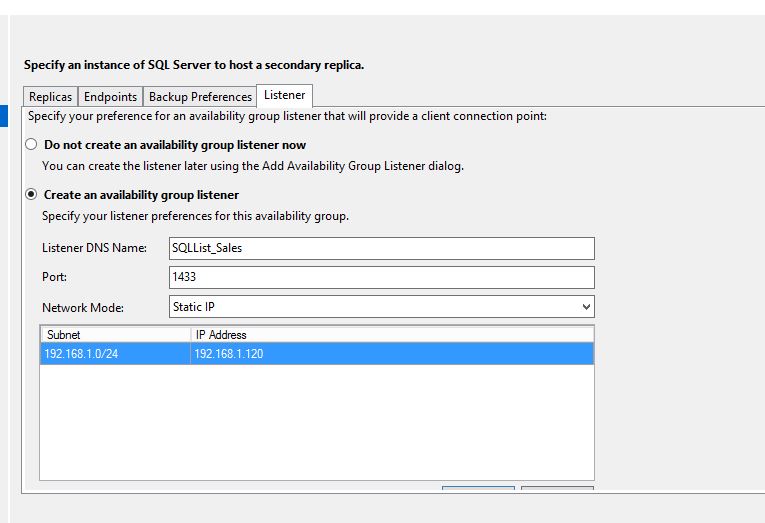
And finally configure Listener:

6.JPG

Below are the corresponding CNOs/VCOs/DNS records created in my AD.

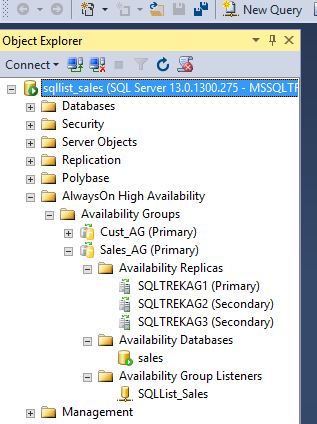
From my SSMS:

9

That’s it folks! Happy weekend…

SQL Server 2016 AlwaysON AG setup – Part 1

This is a quick guide on how to configure AlwaysON AGs on SQL Server 2016. This blog post isn’t a thorough walk through, My goal in this post is to show you guys what’s different in SQL 2016 comparing with 2012 or 2014. (For detailed information on how to setup AGs in your own lab, please refer to my previous posts on SQL 2012).

First and foremost, I’ve built a windows cluster with 3 nodes(No shared Storage) for setting up AGs(See below).

a

Starting from Node SQLTrekAG1, Inserted SQL Server 2016 RC2 media, hit setup.exe…basic sanity checks…next next…blah blah.

1

One thing you might have already noticed, all our management tools and Data tools has a separate link to install. Well, This is a huge change(I would say improvement, YMMV), in earlier versions we had option to select Client tools when selecting features and IIRC data tools was a separate download all together in SQL 2014.

Next:

2.JPG

As mentioned earlier we no longer see client tools(basic and complete) in features selection.

Next:

3.JPG

One more amazing enhancement, now it always remind DBAs about IFI 🙂

Next:

4.JPG

Choose your dirs and if you go to tempdb tab, you can see that now SQL Server is smart enough to identify number of CPUs on the box and will choose number of data files for your tempdb.

Everything else should be similar to what we had in previous versions. Now after performing a standalone installation successfully, you can see SSMS hasn’t been installed.

5.JPG

Now let’s install SSMS on this machine:

All I had to do was double click setup.exe and on Installation tab, select “Install SQL Server Management Tools”and……Oops!Bummer….! Did I already mention, you need to have Internet connection to be able to do this. Well, see below screenshot carefully again.

6

It downloads an 815 MB file(SSMS-Setup-enu.exe), now that’s the media for installing SSMS and other SQL utilities! Store it in your media library, from now on we don’t need internet connection.

Note: You can directly go to https://msdn.microsoft.com/en-us/library/mt238290.aspx for downloading the same(As of 2016 RC2).

Run that executable…I got a warning about shared components already installed(I am good with that) and next to Install. That’s it!

It installs .NET framework 4.6.1(took a while), Report viewer, batch parser, SSMS, SQLCMD, BCP, SMOs, Visual studio 2015 Shell(took its sweet time), SQLPS,Profiler,DTA and all those goodies. Restart if required.

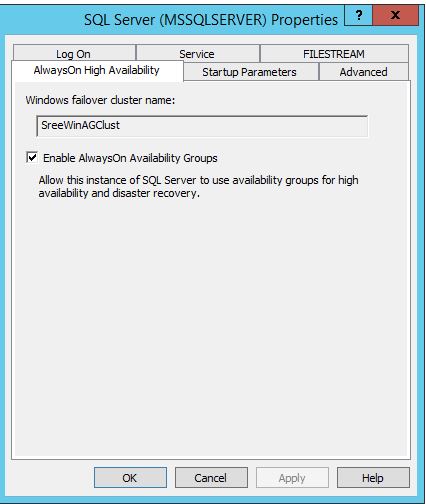
Now, I enabled AGs from SQL Config manager.

9.JPG

I will install SQL by performing the same on all the three nodes and will come up with part-2 later where I setup an actual AG. Cheers!
Installing Linux (CentOS 7) on a VM.

All these days…I’ve seen my fellow Oracle/MySQL DBAs working on NIX platforms, but I haven’t really got a chance to work Full time on these machines being a SQL Server DBA. Well, with Microsoft’s recent announcement(SQL coming to Linux), I’ve decided and committed to explore Linux in depth.  “MySQL” and “Linux” are my go to technologies for my 2016 Road Map besides VMWare! I know that’s too much…but hey, there’s nothing wrong in setting goals for ourselves 🙂

So, why did I choose CentOS? Well, It’s simple….It’s free to download and a replica of RHEL(Red Hat Enterprise Linux). From my understanding, All the commands which run on CentOS should run in RHEL. Once we get the familiarity with these Operating Systems, working on any Linux/Unix machines should not be difficult. So, if you want to get started to Linux, my recommendation is to begin with CentOS.

Screenshot Tour of installing CentOS 7 on Oracle Virtual box:

Prerequisites:

Download CentOS 7.0(ISO) from their website(Just Bing it or google it).

Download Oracle VirtualBox and install on your machine. (I prefer installing it on a VM rather than creating a dual boot machine with Windows and Linux, YMMV).

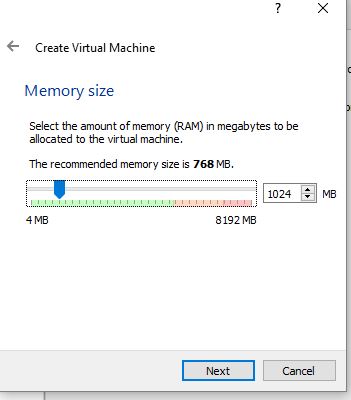
Step1:

1

Step 2:

2

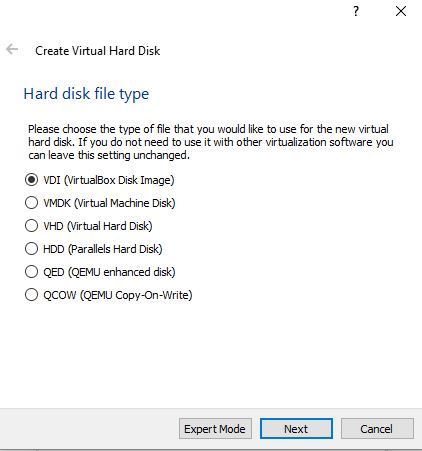
Step 3:

3

Step 4:

4

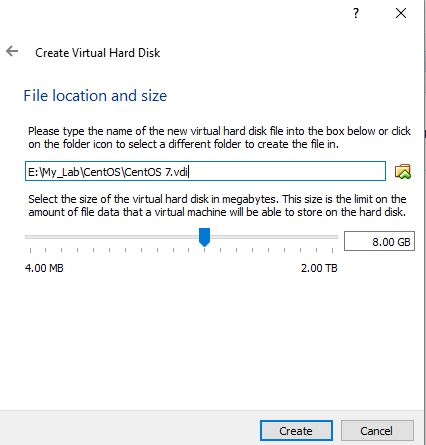
Step 5:

5

Step 6:

6

Step 7:

7

Step 8:

8

Step 9:

9

Step 10:

10

Step 11:

11

In the above step, you can leave it to Minimal Install if you are sure that you absolutely don’t need a GUI. I selected KDE plasma for GUI…(We can load/start OS without GUI if needed, that’s probably what I would do after couple of days)

Step 12:

12

13

Once done, it asked me to reboot the VM. Now am ready 🙂

Note: I haven’t enabled networking and didn’t installed few things. well, if I see something wrong with my setup and if it isn’t working as expected….well, I can destroy my VM and build a new one as needed in just few minutes! That’s the beauty of a Virtual machine.