SQL Server 2019 – VLDB struck in “In Recovery”!

Getting straight to the point, Chances are very high that you will run into the issue that we are going to see in this blog post when you try to restore a database larger than 30 TB running on SQL Server 2019 CU1.

Environment:

SQL Server 2019 CU1
DB1 – 6 TB.
DB2 – 30+TB.

Behavior:

Restoring 6 TB database – Everything goes normal as it should.
Restoring 30 TB database – Database stays in “In Recovery” state indefinitely. Infamous “Non yielding scheduler” stack dump gets created when the recovery process enters roll forward(REDO) phase. To give you an idea, look at below log entries.

Message

Recovery of database ‘VLDB’ (8) is 0% complete (approximately 138 seconds remain). Phase 2 of 3.
Recovery of database ‘VLDB’ (8) is 22% complete (approximately 7 seconds remain). Phase 2 of 3.

***Unable to get thread context for spid 0
* *******************************************************************************
** BEGIN STACK DUMP:
* MM/DD/YY HH:MM:SS spid 4368
** Non-yielding Scheduler
** *******************************************************************************
Stack Signature for the dump is 0x00000000000001BC
External dump process return code 0x20000001.
External dump process returned no errors.
Process 0:0:0 (0x110c) Worker 0x000001B39D42C160 appears to be non-yielding on Scheduler 1. Thread creation time: 13234458222710.
Approx Thread CPU Used: kernel 0 ms, user 70375 ms. Process Utilization 16%. System Idle 79%. Interval: 70579 ms.
Process 0:0:0 (0x110c) Worker 0x000001B39D42C160 appears to be non-yielding on Scheduler 1. Thread creation time: 13234458222710.

Note: I noticed this exact behavior consistently on multiple servers irrespective of what method we use to restore this DB.
Native restore – Fails
Attach/Detach – Fails
Restored using EMC DDBoost – Fails
Restore virtual database by presenting virtual data copies using third party tools such as Delphix – Fails.

Fix:
Drop the database which got struck in “In recovery” and apply 2019 CU4 or above.

I am not sure at what size SQL 2019 CU1 starts to panic, but it was happy with 6TB DB and caused misery for 30 TB DB. BTW…At the time of writing this blog post, we have CU5 available which I strongly recommend if you are planning to patch.


Happy Monday!


Uninstalling CUs/Downgrading SQL Server in Linux(RHEL7)

Back in 2011 I wrote an article on how to uninstall service packs in version SQL 2008/R2 which was quite a popular post at that time based on my wordpress stats. (Well, SQL 2008 was the very first version that allowed us to do that) Fast forward to year 2020 where we can have SQL Server running on Linux in production environments, let’s see how to achieve the same if you ever want to uninstall a cumulative update. Did you notice, I said CU, not service packs this time. See this post for more info on MSM.

First thing first, let’s see what we have got on the box. Pulling that information is quite simple, Run “sudo yum info mssql-server” which should return something like this.

Of course you can get this info from SQL or several other ways in Linux. Okay, now we know we got SQL Server 2019 CU5 running on this server to work with. Let’s just assume CU5 broke something in my database and I want to go back to CU4. How do I do that?

Run “sudo yum downgrade mssql-server-<your_desired_version_number>.x86_64“. Okay, so how do I get those version number details? Microsoft has those details maintained and updated regularly in their release notes. Check below links for 2019 or 2017 based on your version.
SQL 2019 release notes.
SQL 2017 release notes.

Also, We can get this information directly using YUM super powers as shown below…
sudo yum list mssql-server –showduplicates

If you want additional details for individual packages as shown below, just replace “list” with “info”, the command would be “sudo yum info mssql-server –showduplicates

Now that we have all the information what we need, let’s go to the actual fun part.

Downgrading from SQL 2019 Cu5 to CU4:
Command:
sudo yum downgrade mssql-server-15.0.4033.1-2.x86_64

As you can see it clearly states that CU5 was removed and CU4 was downloaded and installed successfully 🙂

BTW, the basic golden rule still remains the same,  you can’t downgrade to a lower version(from SQL 2019 to 2017, –> Nope, that’s not how downgrade works)! You are allowed to do whatever you want as long as you are staying at same version.

Install and open/run Azure Data Studio in CentOS

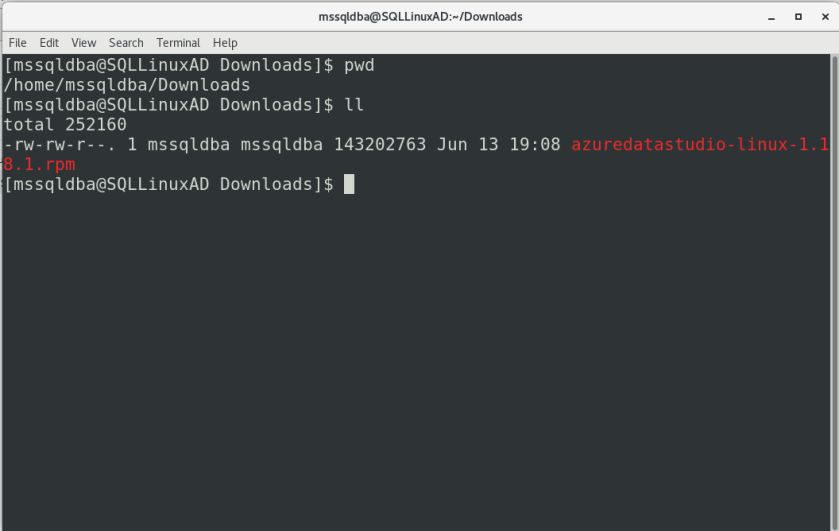
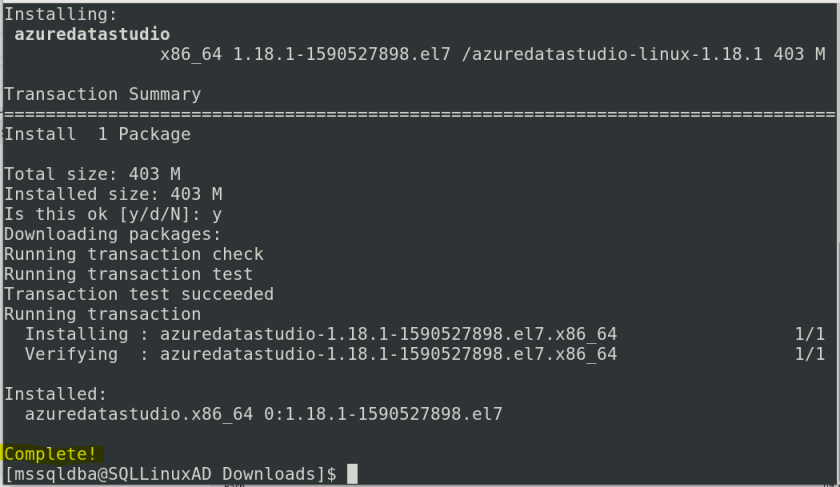
In this blog post let’s see how to install Azure data studio in CentOS and where/how to locate the executable if you are unable to find in GUI. For this demo, I am using CentOS 7 as my operating system. Installing ADS in CentOS is pretty straight forward process as detailed in Microsoft’s documentation here. My personal preference is to download rpm package and issue “yum install”. See below for screenshot tour of ADS installation on my machine.

sudo yum install azuredatastudio-linux-1.18.1.rpm

Where is Azure Data Studio in CentOS?
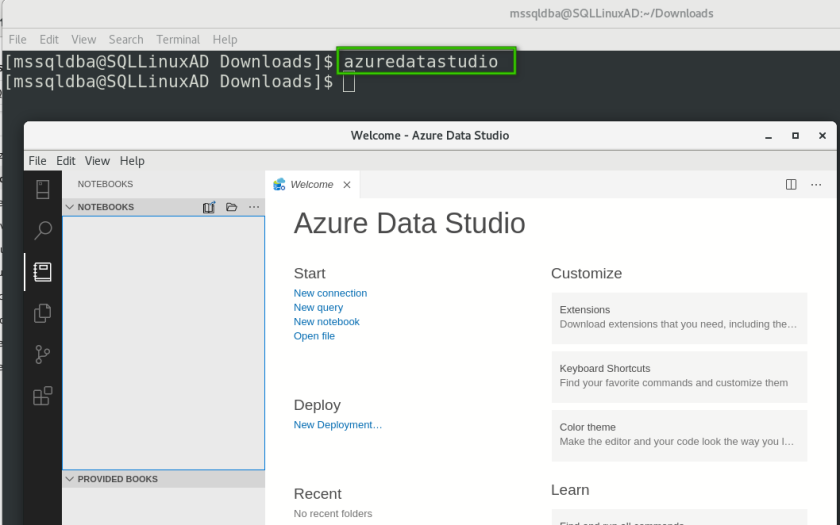
How to open Azure Data Studio in CentOS?

Okay…now what? Where to locate the executable and how do I open Azure data studio in CentOS? GUI in CentOS is not as user friendly as you can see in some other Linux OSs (Mint for eg or few other Ubuntu flavors of Linux). In windows you can locate the program in start menu or even in few desktop experience Linux distributions it’s extremely easy to just search in application center, but that was not the case for me in CentOS 7.

Well, I am going to use “which” to locate azuredatastudio executable/command.

As you can see it’s already in my /usr/bin with a symlink to its original location. Okay, so all I have to do is type “azuredatastudio” in my console from where ever I want to and voilaaaaaaaaa 🙂

Happy Monday!

How to install MongoDB in RHEL & in Docker Container.

In this blog post, lets see how to setup and configure MongoDB in Linux environment (I am using CENTOS in my lab, but the steps to follow are exactly same for RHEL) and also how to spin up a MongoDB container(s), I will be using Dockers for all my containers.

Setup MongoDB on a Linux machine

Download the mongoDB repository file or create it manually in yum.repos.d folder with the content as shown below.

Go to the official MongoDB documentation for more specific details on how to get a specific release or how to pin a specific release.
Now that I’ve my repository configured, All I have to do is to run below command.

sudo yum install -y mongodb-enterprise


Great, At this point I’ve installed MongoDB enterprise on my machine, but it is in stopped state as shown below and I had to bring it online.

That is all it takes to setup MongoDB on a Linux machine with default values. In most of the cases we may want to change the default paths etc per requirements and standards in place. Well, let’s check them out and customize per our needs…

Default directories:
/var/lib/mongo – This is where your database files will be created.
/var/log/mongodb – This is where your log file(s) will be created.
Note: These are Error log files, don’t get confused with log files term that we use in our SQL Server world 🙂 In Mongo, write ahead logging is achieved by something called journaling and journal files will be created in a separate folder under “/var/lib/mongo”
The Config File:
/etc/mongod.conf
This is the file which holds all the paths, configuration settings, parameter values and what not. There are hundreds of things that can be configured, MongoDB official documentation is your best friend here.
For example, To setup a data  and/or log directory other than the default directories, you can just create the directories and specify them in /etc/mongod.conf file.
storage.dbPath to specify a new data directory path (e.g. /mounts/datadir/directory)
systemLog.path to specify a new log file path (e.g. /mounts/logs/mongo/mongod.log)
Note: The user(“mongod” is the default user/group) running MongoDB must have access to these directories.  You can make it as owner of your mongodb folders by running below command.
chown -R mongod:mongod /your/dbpath/

Create a MongoDB Docker container

Now let’s see how to spin up a MongoDB container in docker environment.  First step is to pull the required image locally and then build the container. I am using a brand new machine with no images downloaded so far. So, to begin with I searched for the official MongoDB image and issued a docker run command as shown below.
Note: Docker run will also take care of pulling the image if you don’t have it. Or you can issue docker pull and then a docker run….It’s up to you.
Command:
docker run -d -p 27017:27017 -v data: /mongo/data/ mongo
-d : detached mode, to get control back of my current console window (Optional).
-p : mapped local port 27017 on my host to mongodb def port 27017.
-v: created a persistent volume (Optional).
And you know what, we are done! That’s all it takes….you have everything ready in less than a minute 🙂
To connect to my mongodb container from this host, All I had to do was issue “mongo” and voila I am connected, since I am using default port of 27017.
Note: I have mongodb client tools already installed on this machine.
Let’s say I want to create few more Instances of MongoDB on this machine, all I have to do is leverage docker and spin up containers listening on different ports as shown below.
docker run -d -p 27018:27017 -v data: /mongo1/data/ mongo
docker run -d -p 27019:27017 -v data: /mongo2/data/ mongo
Cheers!

How to install docker engine in CentOS 8

In this short blog post, Let’s see how to install Docker engine in CentOS. I thought it would be pretty straight forward process of issuing a command or two and be done with it, but I ran into a small hurdle that I would like to share.

So, I was following official documentation(https://docs.docker.com/engine/install/centos/) from Docker for installing on my CentOS(8) machine. As you can see below, I had my repo all setup and ready to go.

When I tried to install as per documentation, I ran into dependency issues for containerd.io package (CentOS 8 as of the day of this writing doesn’t support few specific versions of containerd.io package).

Error:
Problem: package docker-ce-3:19.03.9-3.el7.x86_64 requires containerd.io >= 1.2.2-3, but none of the providers can be installed.

We have couple of work arounds here…
Install CentOS 7 containerd.io package manually and then install docker-ce engine/upgrade and voila. ( This is what I am going to show you guys below)
or
use –nobest option as suggested by yum in order to install appropriate version of containerd.io package.

Alright, now it’s time to manually download and install containerd.io package. Get the latest stable package details for CentOS 7 from here:
https://download.docker.com/linux/centos/7/x86_64/stable/Packages/

sudo yum install -y https://download.docker.com/linux/centos/7/x86_64/stable/Packages/containerd.io-1.2.13-3.2.el7.x86_64.rpm

Great, now it’s time to install docker-ce package which also takes care of dependent docker-ce-cli package.

Hurray! Now it’s time to start the docker engine.

Perfectoooooooo……My CentOS machine is all set for hosting linux based containers.

Happy containerization folks!