This is the 3rd part of the SQL Cluster 2008 Installation Series.
In the 2nd part InstallCluster-Part2 I’ve explained how to Install Windows Server 2008 on your Virtual Machine(s). In this part let’s try to configure our DC and join rest of the Nodes into our domain.
why to wait, Let’s start!!
Before proceeding any further let me tell you what I’ve done so far.
I’ve Installed all the latest windows Updates(Including SP1) to all my three machines(you’ll get .Net framework 3.5 SP1 along these updates).
I’ve Disabled Firewall and UAC (User Account Control) on all the machines(This makes our cluster installation little bit easy dealing with Ports and IP’s and etc. Since this is a LAB environment, I’m Okay here. On your real environment you shouldn’t disable Firewall).
I’ve renamed the Computer names to SANDC, NODE1 and NODE2 as per our game plan. By default Windows comes up with some goofy names! To rename your computer, Right click on My computer – >Properties->change settings ->change button(system properties window) and give a name and OK ->OK. Reboot Server.
Configuring your 1st domain controller in your forest:
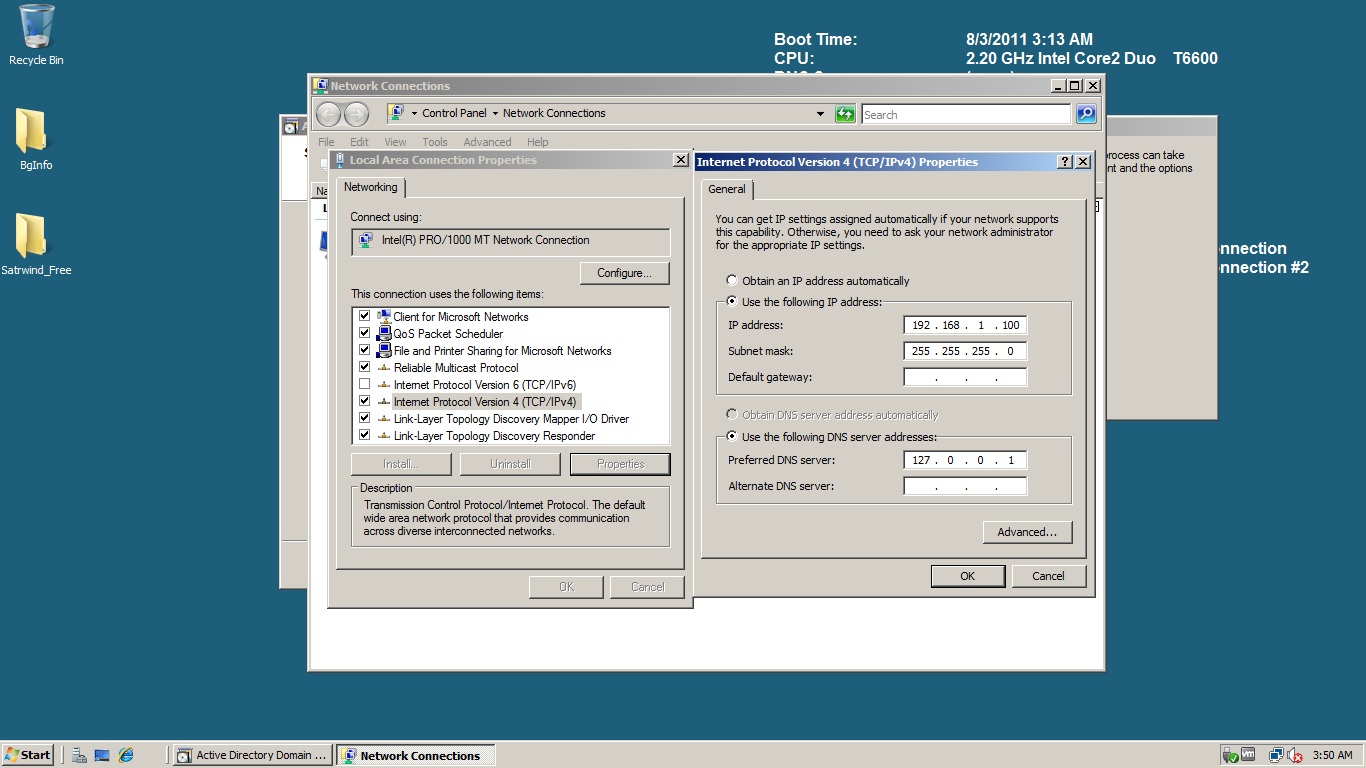
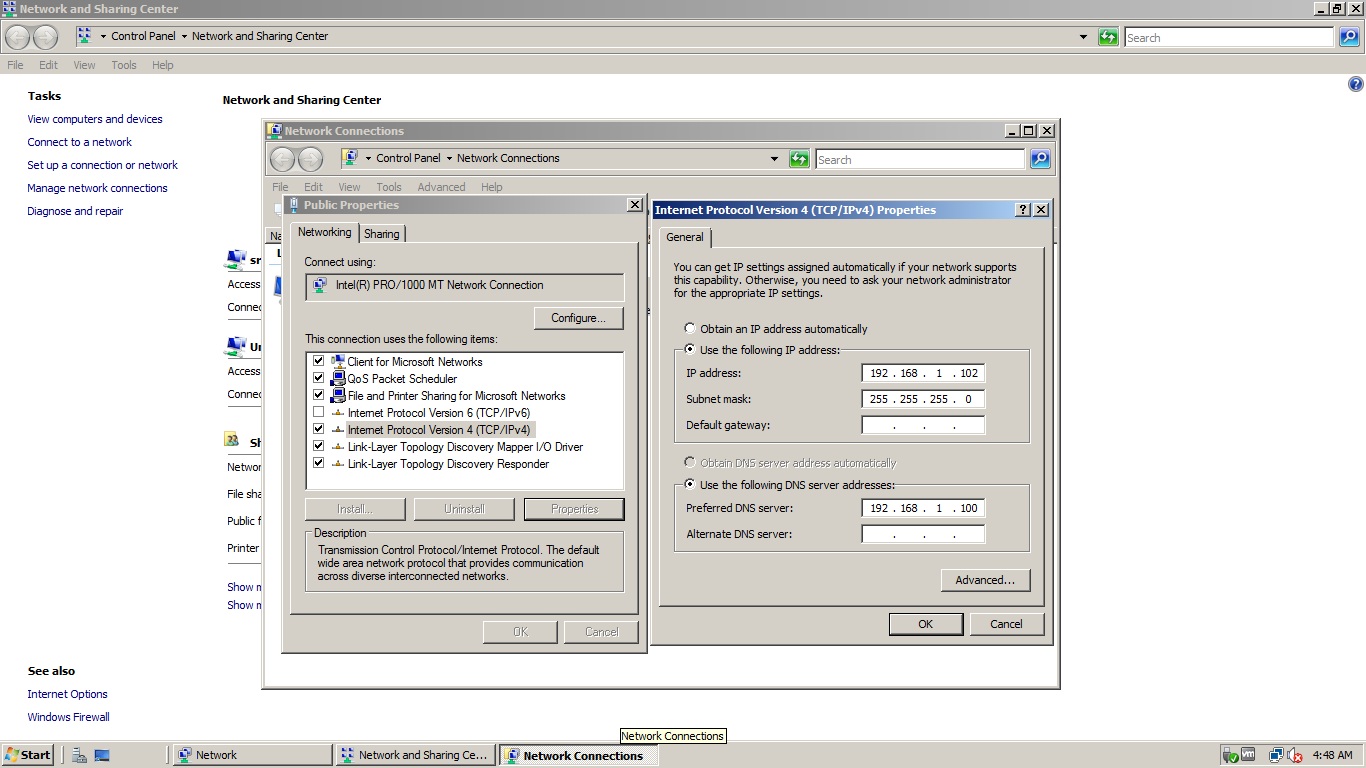
Very Very Imp: My NIC Settings on SANDC Machine
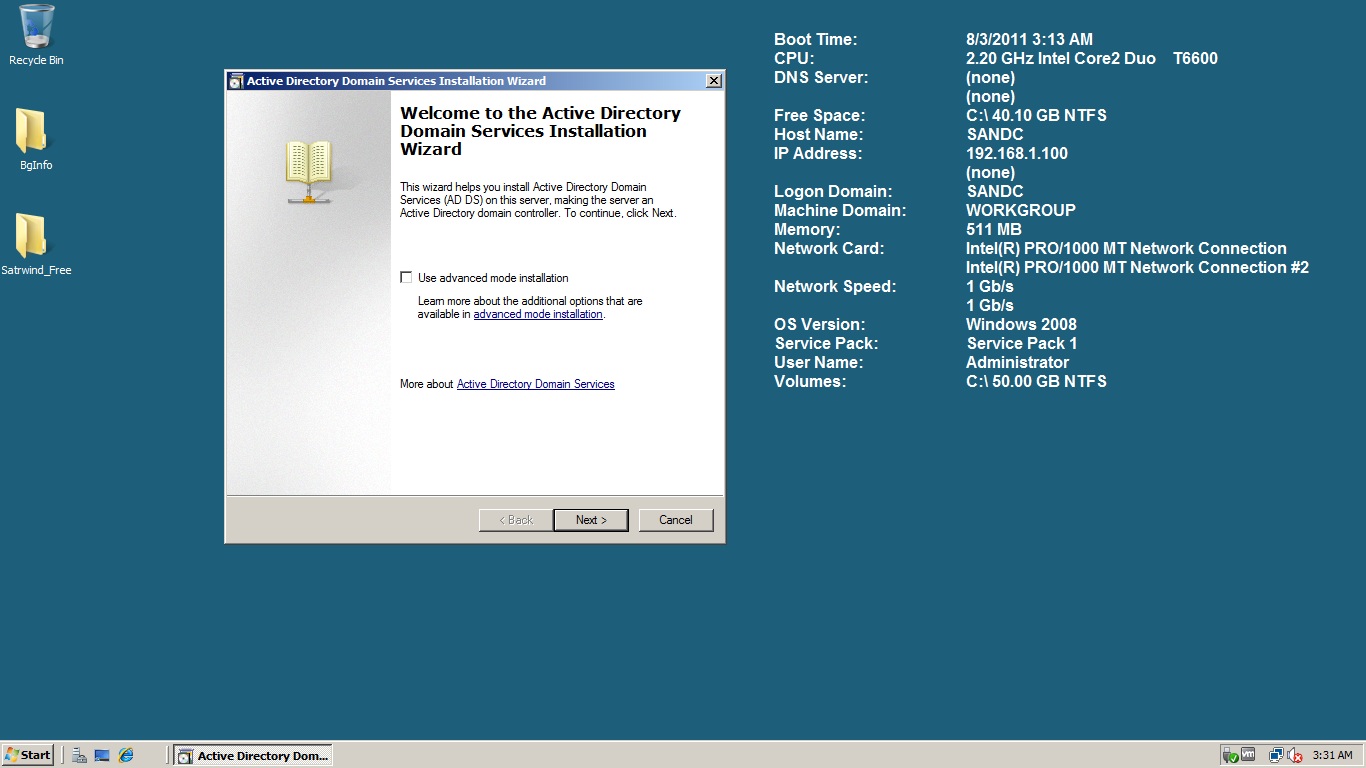
Go to your SANDC machine and Start ->Run and type “dcpromo” without double quotes.
You will be welcomed with the below screen.
Note: BTW, if you want that background information what I’m pulling on my Desktop you can download a software called “BGINFO”:)
Now, let’s proceed further by clicking Next -> Next. You should be getting the screen as shown below.
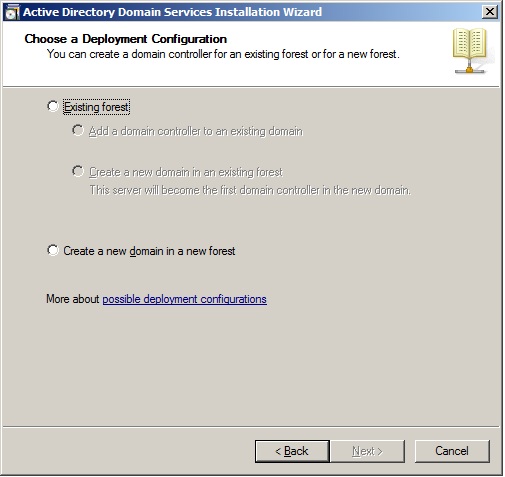
Choose Create a New domain in a forest. Give a name(FQDN) for your domain.(I’ve chosen sree.local in my case). Choose Forest Functional level as 2008 as shown below and click Next(we would not have any issue because all of our servers are running on Windows Server 2008).

Select DNS Server and proceed further as shown below.

It might pop up a warning message, you can ignore that for our lab. In the Next Screen it asks for Active Directory Database locations and Sysvol locations. Leave it to default and proceed further. It’ll ask to configure Directory mode Restore Admin Password. Choose a strong pwd and proceed next. If everything goes well upto this point, you should be seeing the below screen

It will take some time to do all the MuboJumbo behind the scenes and configure all our settings. Finish and Restart. Once you restart the machine, you should be seeing, the machine is part of a Domain called “sree”, not anymore a work group member…hurray!!!! 🙂
Now, if you go to Start->Administrative tools, you will be seeing all the Active Directory related stuff being created on our Domain Controller. I’ve created a spl user and added him as a Domain Admin(just in case needed for any emergencies).
Joining Other Servers(Node1 and Node2) to Domain:
Okay! Now it’s time to join our two other machines Node1 and Node2 to our newly created domain.
I’ll show you joining Node1. You can follow exactly the same for adding Node2 to (y)our domain.
Joining Node1 to sree.local Domain:
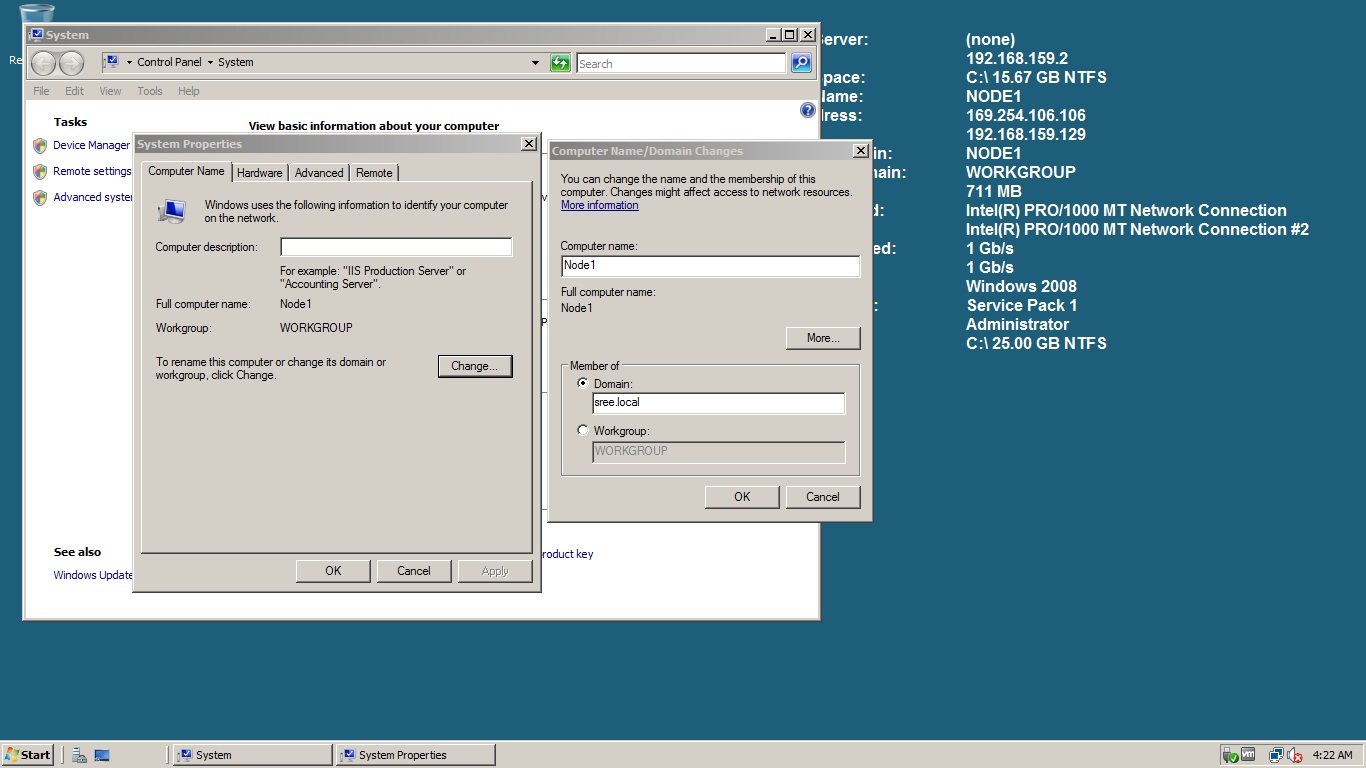
Login to Node 1 with administrator account and go to the same place where you renamed the Server name to Node1.
Change Member of Workgroup to Domain as shown below. (In my case I’ve created a domain called sree.local)
Once you click Ok, it will ask for credentials which has necessary permissions to add new servers to domain. In my case I’ve chosen the Domain Admin account to perform this task. If everything has been followed accurately till now, you should be seeing the below display message.(A reboot is required to apply these changes)

Perform the same on Node2 as well to add it into domain.
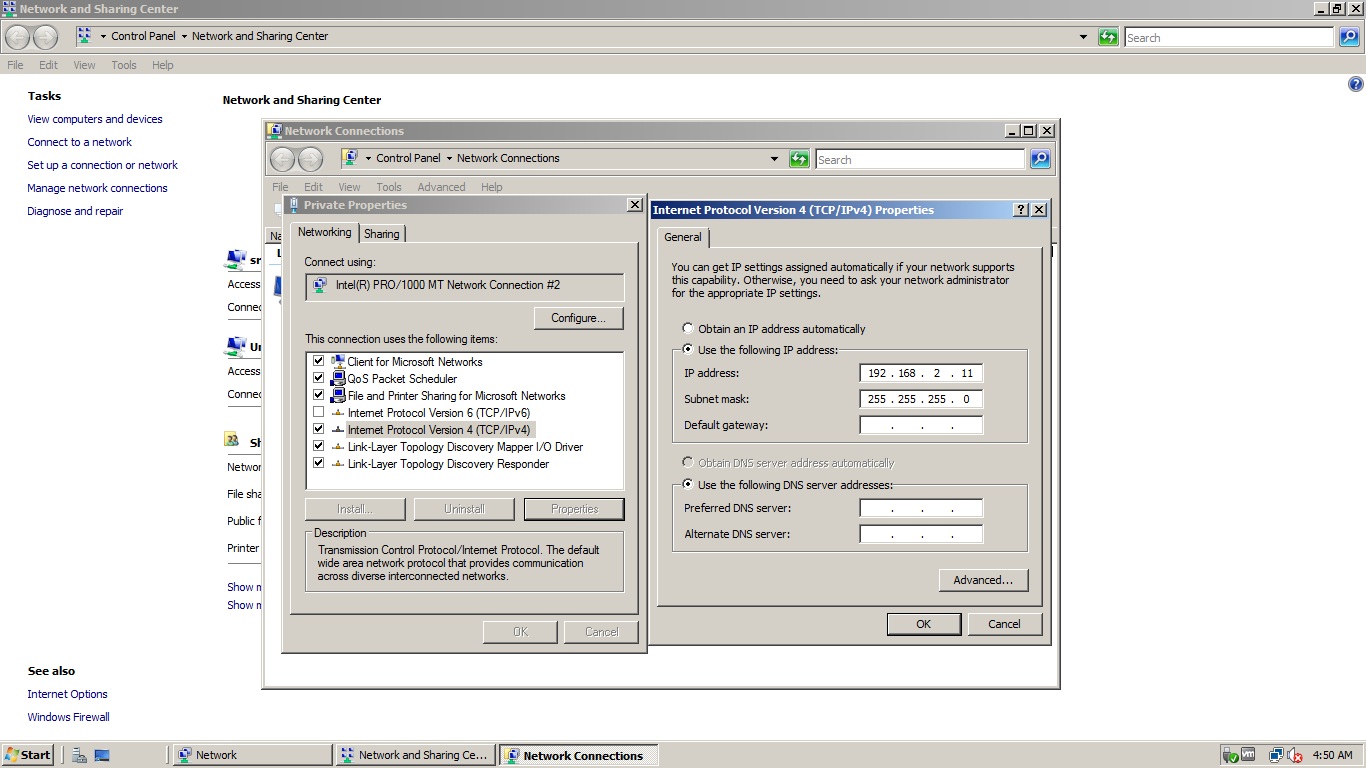
FYI You can see my Network(NIC and IP Addresses) Settings in below Screen shots.
My NIC Settings for Node2 machine:
192.168.1.102 – Public(Bridged)
192.168.2.11 – Private(host only)
Public:
Private:
NIC Settings for Node1:
Exactly similar settings except the change in IP Addresses.
192.168.1.101 – Public(bridged)
192.168.2.10 – private(host only)
Very Important: The preferred DNS IP address should be our SANDC machine IP(192.168.1.100 in my case) on Public NIC’s for both Node1 and Node2 machines.
Let’s see how to configure SAN using Starwind Software and create a windows cluster in the next part of this series.


Leave a comment