Am all excited to let you know that I’ve downloaded SQL Denali CTP3 today and I’m installing it on my test laptop. I would like to share it with the community:)
PS this is a Standalone installation.
Workstation Config:
System Type: x64-based PC
OS Name: Microsoft Windows 7 Home Premium
Version: 6.1.7601 Service Pack 1 Build 7601
Installed Physical Memory (RAM): 4.00 GB
BIOS Version/Date: Dell Inc. A08, 11/7/2009
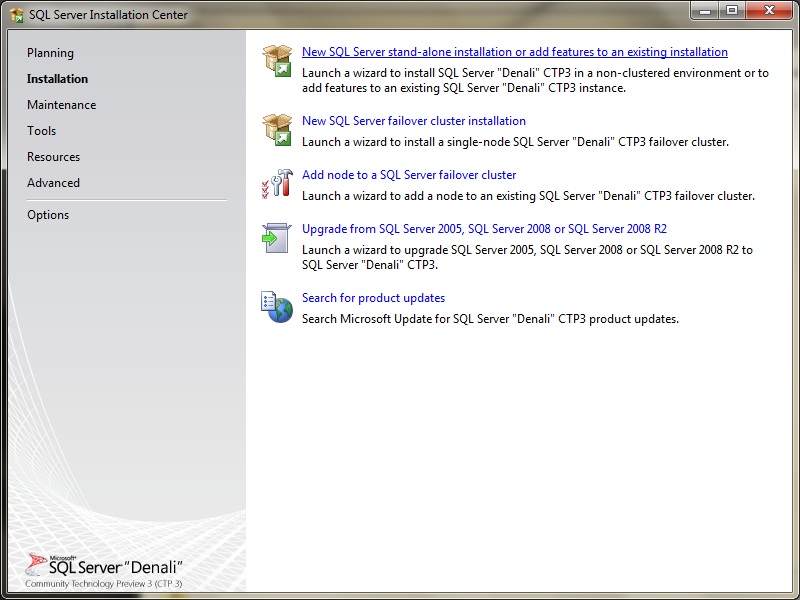
Okay! Let’s start Installing SQL Server. Insert your DVD(ISO) or just double click setup.exe file which you’ve downloaded. You will be welcomed with the below screen.

Select Installation Tab on your Left side and click on new SQL Server Standalone Installation as shown below.
It does a basic validation and you should pass all the tests as shown below. If any of the Requirements are not met, it will let you know what action is needed to proceed further.

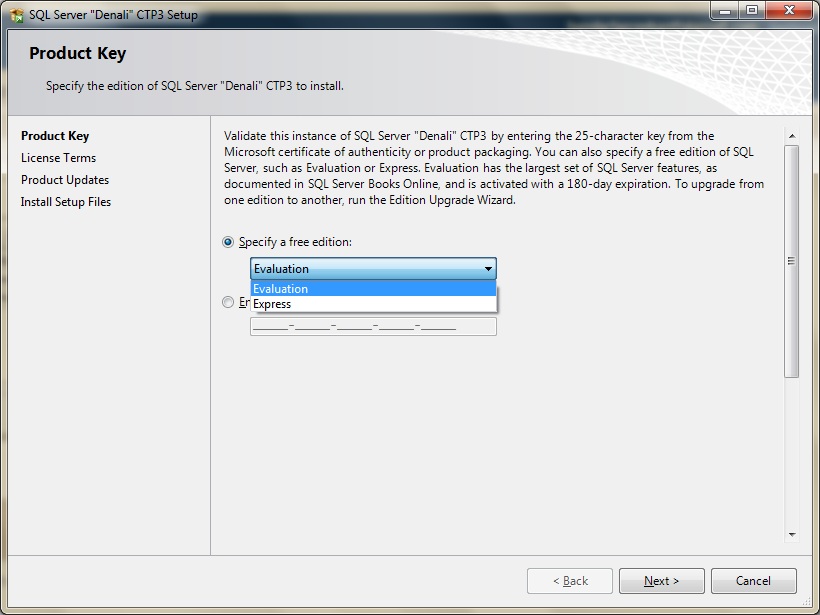
Choose Evaluation Edition as shown below for testing all the Enterprise Features and Read/Accept the License terms.(As mentioned in another blog post under the same label it’s a 180 Days eval version).
After accepting License terms and Next, you are shown with the below progress screen of SQL Server Installation.

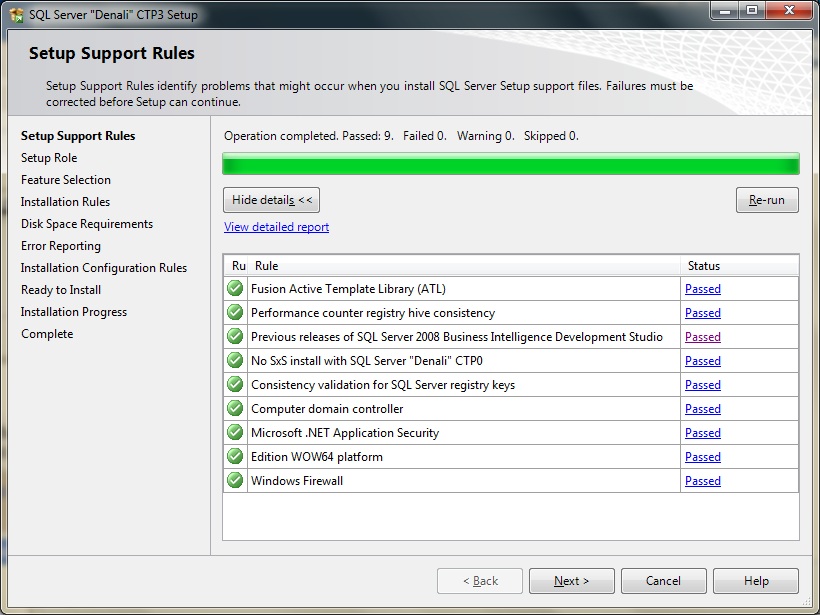
Now as you can see it has done a detailed rule check. You can see it also checked for SQL Server 2008
BIDS Installation. FYI Denali CTP1 had lot of issues with BIDS when the machine already had another Instance of SQL Server 2008. It’s good to see Microsoft included this test before proceeding further:)
Note: BIDS is a shared feature on a given Server unlike Database Engine.
Next screen is interesting as shown below – It has an option to Install All features with Defaults (Ideally, Which you don’t go for this on your Production Servers). For more realistic feel I’ve chosen Feature Installation.

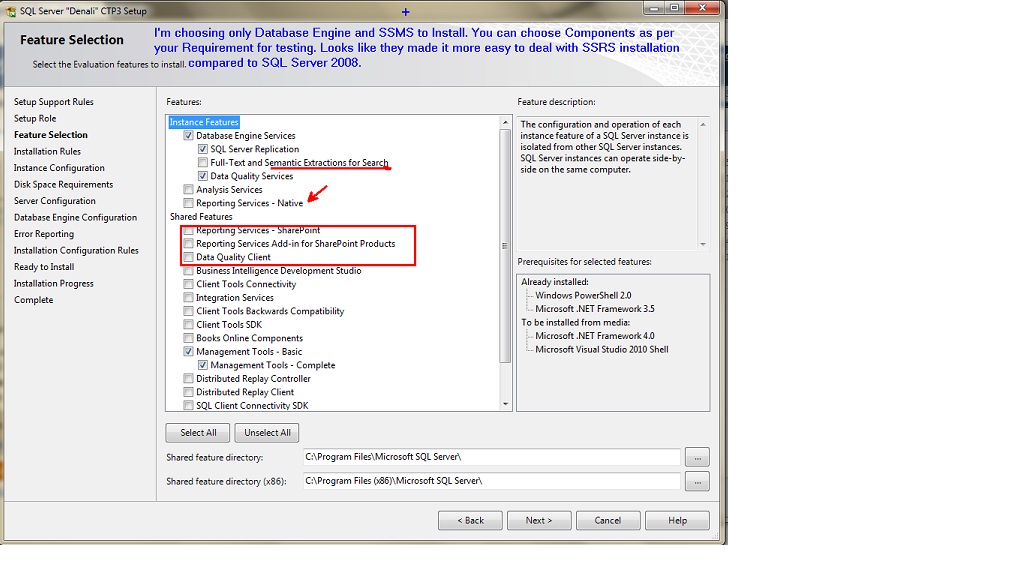
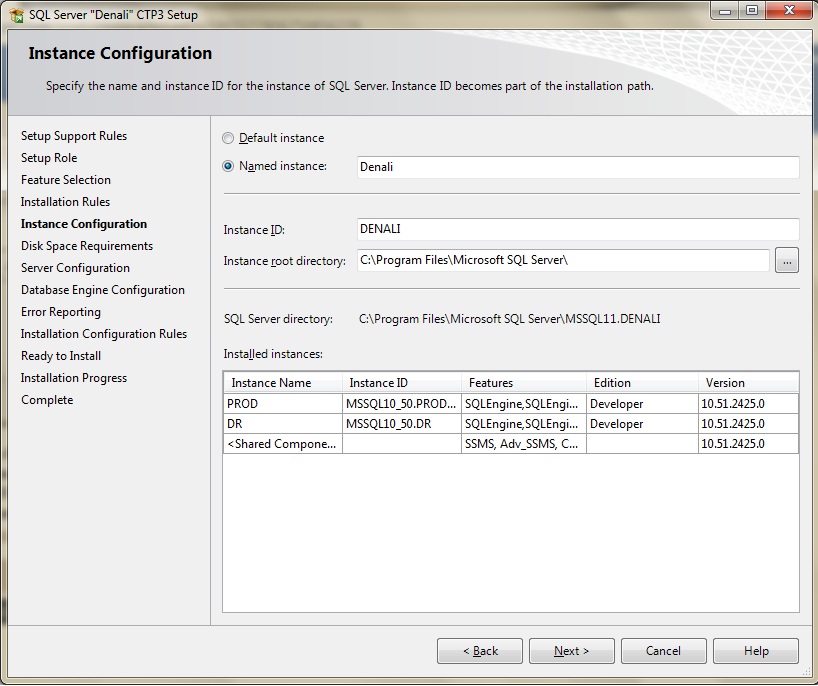
Time to choose your components and features as shown below. My machine already has 2 instances of Database Engine and i believe one SSRS too…So I don’t want to hurt it any more 🙂
I’m choosing my Instance configuration as follows:
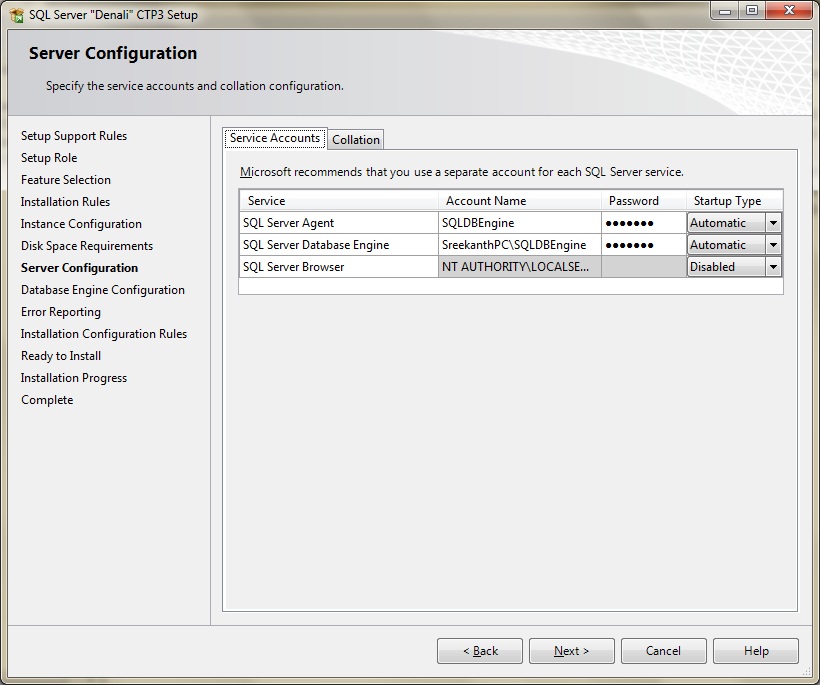
Next, time to choose your Service accounts. These will be domain accounts which your Windows Server Admin will provide you with the Password. You can leave it to default for test installations or change it accordingly. I’ve chosen my own accounts which i created for this installation purpose as shown below.
Now it’s time to choose your Authentication mode for your Denali Instance. I’ve chosen Mixed mode(this can be changed very easily even after installation). This is the place where you’ve to provide all your MDF/NDF and LDF file locations in the “Data Directories” tab. You’ve to choose atleast one account as a Sysadmin on this SQL Server. I would recommend to add Current User and SQL Server Service Accounts here as shown below.

It will do a final Config Rule check and creates a Config file depending on the features you’ve selected as shown in the below two screen shots.


It took me around 15 minutes to finish the installation and got the below screen saying “COMPLETED”:). Am all set to Play with Denali Database Engine Now.( Except HADR, which requires DENALI to be installed on a Windows Cluster)

Wowwww…….It’s a Brand New Look of SSMS.
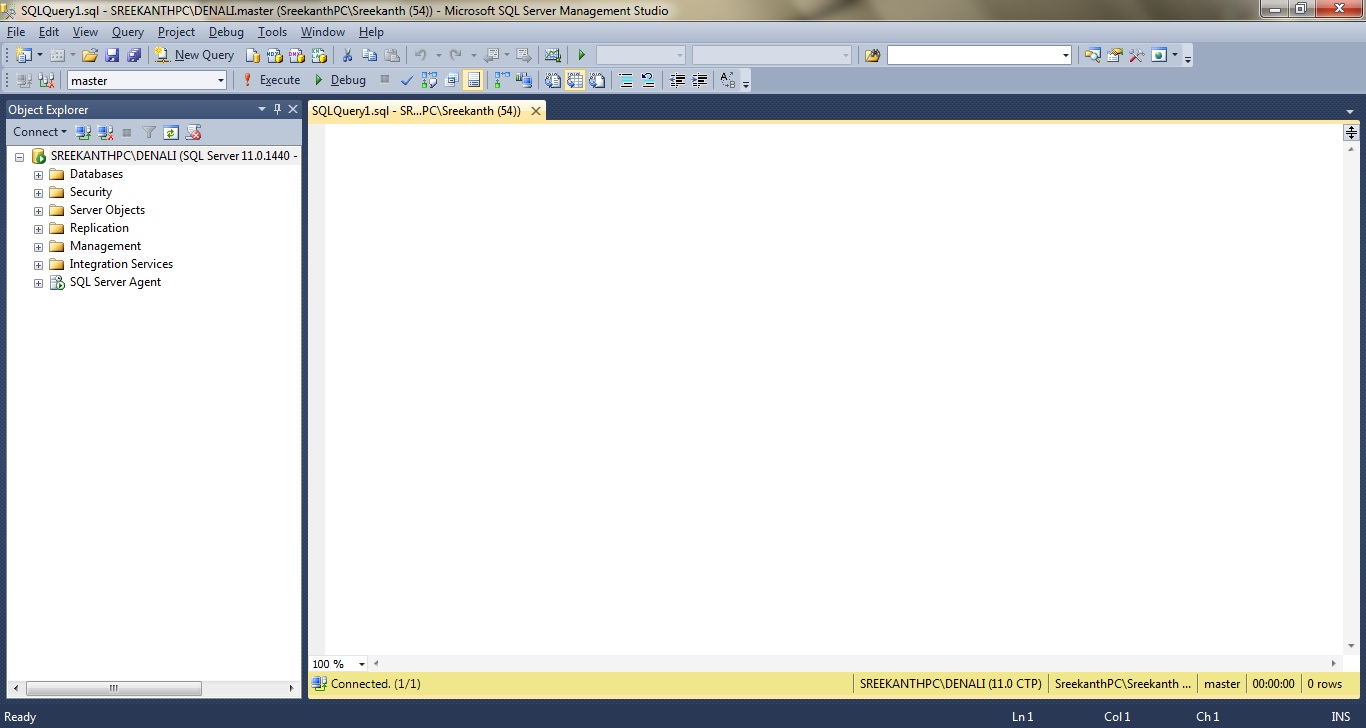
Personally I love Blue and i feel like MSFT designed this for me:)
Well, That’s it Folks! Hope this info will be helpful and useful to you. Happy Testing Denali CTP3.


Leave a comment